Overview
This tutorial will explain how to configure AMPPS to allow access to the apps over local network. E.g. Install WordPress and access it using a domain name/IP over LAN.
Add a Domain
Go to the Add Domain page in AMPPS enduser panel using the following link :
http://localhost/ampps/index.php?act=ampps_domainadd
http://localhost/ampps/index.php?act=ampps_domainadd
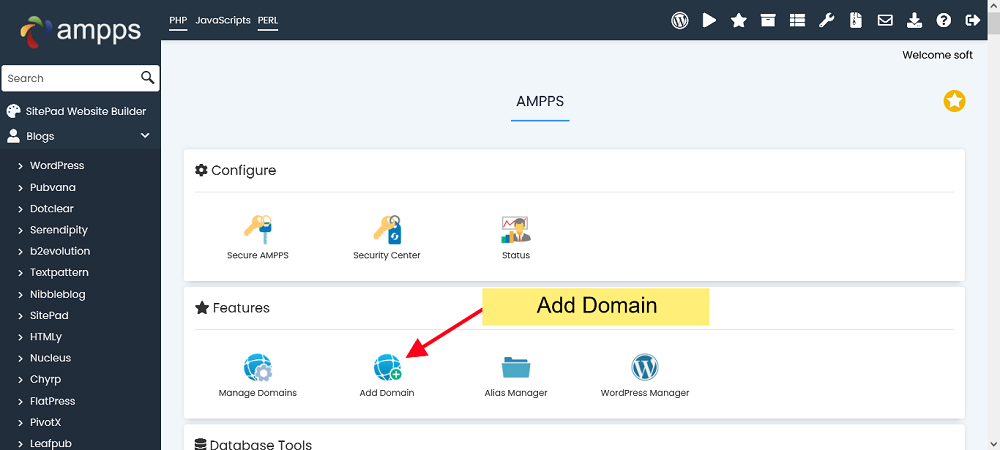
Add IP as Domain Name
While adding the domain add your IP/domain name which will be accessible from your local network. In this tutorial we will use the IP 192.168.1.75 as an example which is accessible from our network.
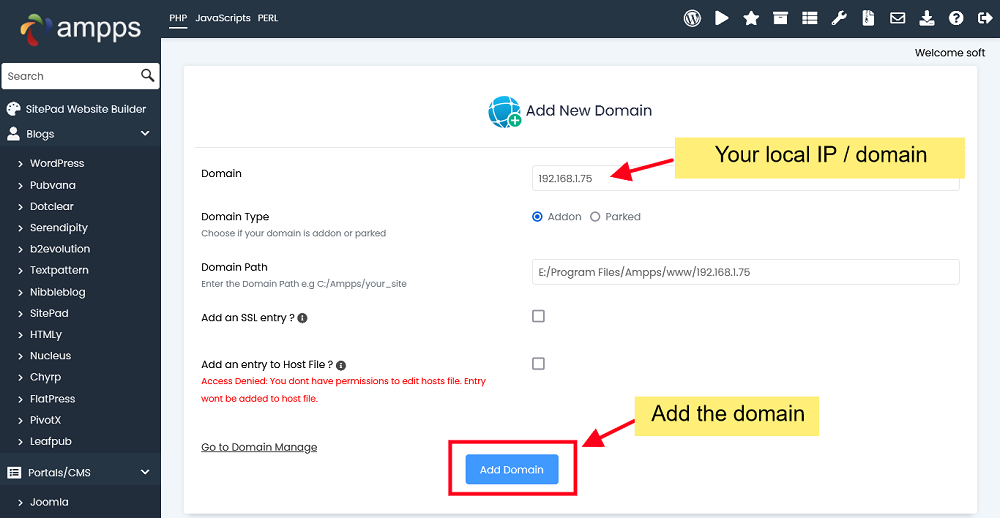
Domain Added
Once the domain is added we will proceed to installing a script which we want to access over network. In this tutorial we will be installing WordPress, similarly you can install any script/app as per your requirements.
Choose a Script
You can select the script you would like to install from the left menu in AMPPS enduser panel : http://localhost/ampps/
We are selecting WordPress for this tutorial.
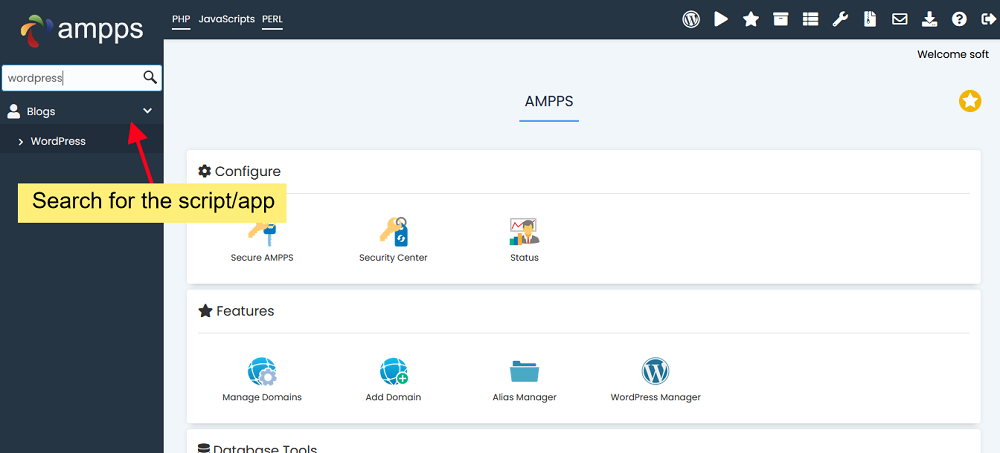
Select the Domain
On the install form of WordPress or the script that you choose to install select the domain name that you would like to use from the dropdown. In our case it is 192.168.1.75 as that is the domain name we added.
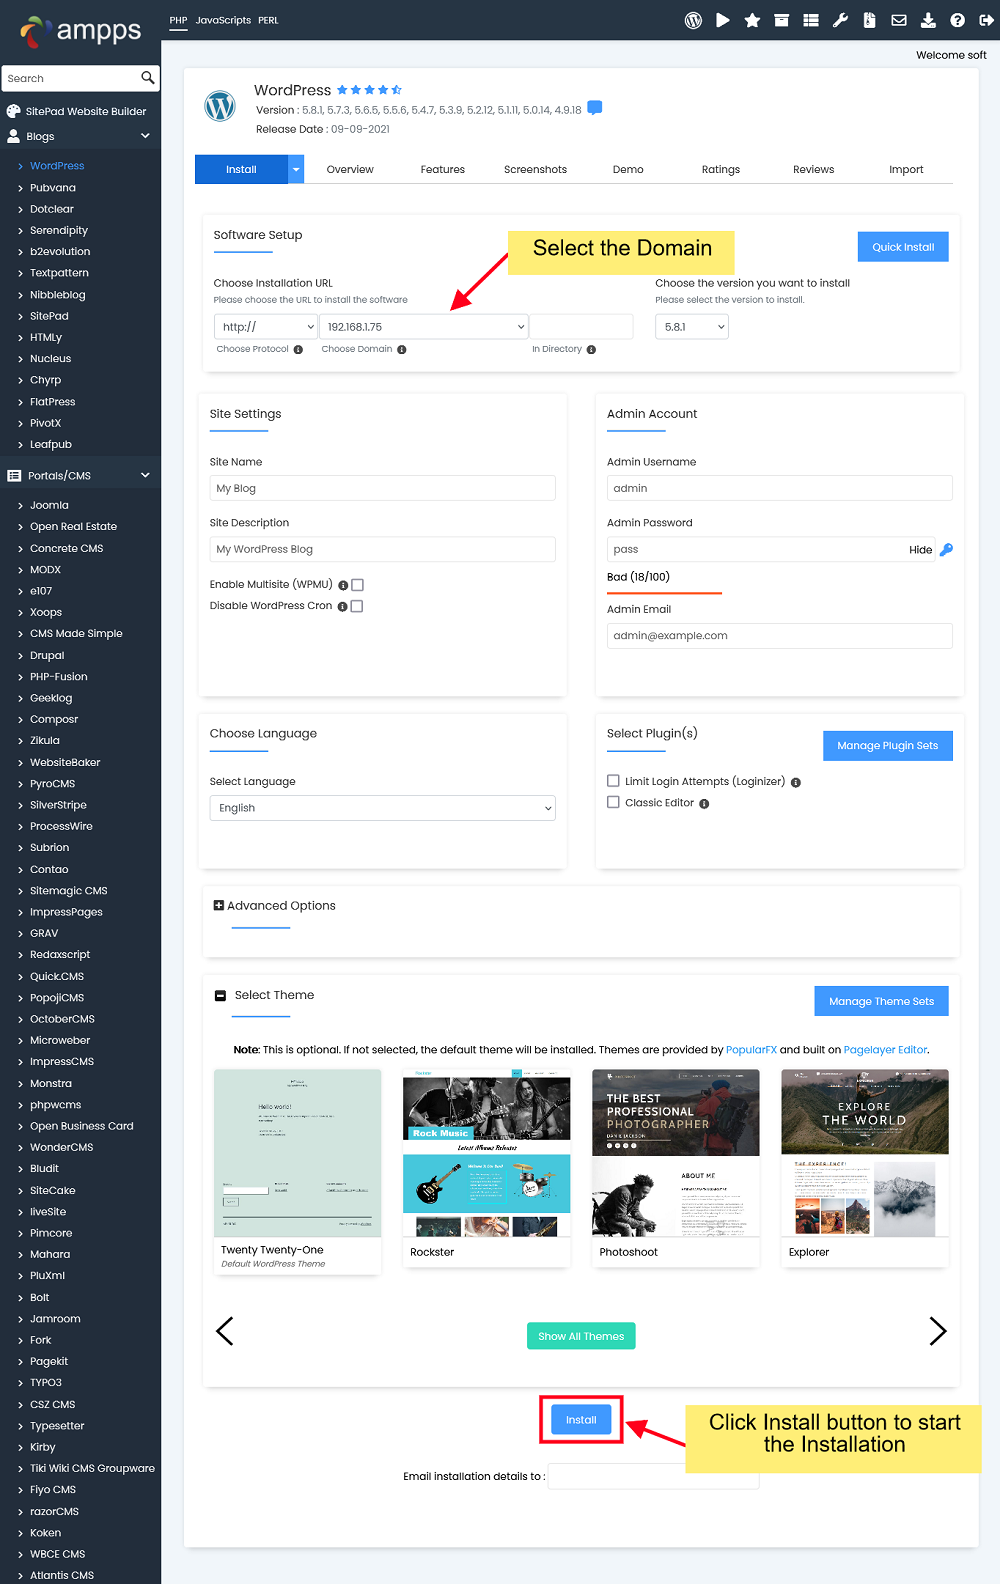
Fill in the install form and hit the "Install" button to start the installation.
Installation Completed
Sit back and relax, let Softaculous do the hard work. Once the installation is completed you will see the below screen and you can then access the installation over your Local Network (LAN) with the domain name or IP that you added
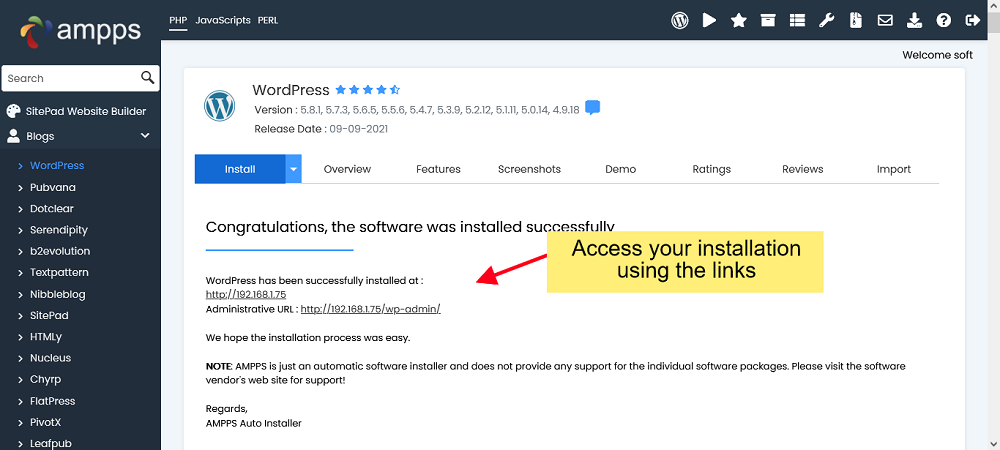
That's it! You have successfully installed and configured WordPress to be accessible over your Local Network (LAN).
If you face any issues, please open a Support ticket with us.
